


This page may take some time to completly load. The reason is that there are over 100 photos of the outfitting process. That's a large number of photos. |
The Objective |
We've been asked to outfit the Ryegate Volunteer Fire Department's 1997 Ford 350 truck, turning it into a Type 6 Wildland Engine. This is a nice opportunity to outfit a Type 6 that will be a big boost to the department's equipment. This webpage will offer a means for members of the Ryegate community to check-in on their truck's outfitting progress - from the time they dropped off their truck - to the moment that they took delivery of their outfitted truck. They'll get a few enhancements on their truck such as Direct-Tank-Fill. This feature will allow re-fill of the water tank without a firefighter having to climb on to the truck bed and/or water tank. The trend in the world of firefighting is to keep personnel on the ground rather than risk injury climbing on the truck, night or day. We're also going to install some Ground Lighting. NFPA requires (suggests) that the ground surface at all egress areas around the cab and body be illuminated to a specific level at entry, egress and rear apparatus areas. We are not going to attempt that, due to time constraints. We would however like to install ground lighting on both sides and the rear of the bed/compartment areaPer NFPA, cab ground-level lights must operate automatically. If desired, they also may be manually switched. We're going to settle for a single switch on the pump panel. Given the uneven terrain around a Type 6 truck at night, it's best to simply leave all the ground lights on, via one switch. I sincerely appreciate the RVFD's confidence in my truck-outfitting work. I am doing my best to have the truck ready for a State inspection on June 2nd, 2006. I envision the truck being completed within a couple of weeks after that. Please check back over the next three weeks as new updates and photos are posted.
|
The Updates |
June 20, 2006 Tuesday Today's the day. At 3:00 PM, the Golden Valley County Fire Warden arrives to take delivery of the truck. Funding for the outfitting was via County funds. It was a light day of wrapping things up. I gave the truck a bath and then took a few photos. I also took an inventory of all the parts that went into the truck. We'll include several photos below. It's nice to have this project behind me - many hours of spare and not-so-spare time went into this truck. I plan to attending this evening's training session to answer questions and more importantly take photos. 4.75 hours. This brings the grand or not so grand total to 219.75 hours. June 19, 2006 Monday Wonder of wonders - the one inch high-tech booster hose arrived today - two lengths of 75 foot, with NH couplers. The wrong hose arrived a few weeks ago. Rabbits were pulled out of several hats to get the correct hose here... in time for the RVFD June training. Photos are provided further down on this page. Would you believe that we have exceeded the 100 photograph mark? Visitors today: Willie Paavola and Steve Balou of the Dean Creek VFD. They were rather impressed with what the Ryegate department is about to receive. 2.75 hours. This brings the running total to 215.00 hours. June 18, 2006 Sunday Many photos were added today. Today was a much better day. All systems and aspects of the fire apparatus doings on the truck came together today. What's more, I had assistance. William Stratman arrived and became keen to tackle the electrical doings. Now that the panel was in there was much more wiring to do. Bit by bit, I simply let Willie take on wiring the: Water Level Gauge, Low Oil Pressure or Battery On Lamp, Ground Light switch, Deck and Panel LED Lights switch and the Engine Hour Meter. He seemed to enjoy it and his efforts were a big help to me. Mark Solonoski and Neal Sillivan arrived and did a fabulous job of installing the throttle, choke and exhaust primer cables. The throttle cable was very difficult to install. I am grateful for their help which took several hours. During all of the above, friend Tabby arrived with Dan and Dean. Dean is a firefighter type from ? near Great Falls. Dean certainly seemed to like the equipment. In fact all three of them did. Mark, Neal, Willie and I managed to get the foam system hooked up again then it was time to test all the systems. All the systems functioned and functioned well. The truck truly performs in a versatile and sound fashion in terms of my efforts. It all came together well. Tuesday evening's RVFD meeting will center around being trained how to operate the fire part of the truck. I hope to take pictures. There are several photos of today's doings below. 8.00 hours. June 17, 2006 Saturday This was an odd day and a ten hour day at that. James spilt enamel thinner or such on a pump panel label. Not good. So, he phoned and inquired whether I had a spare label. I did, so he drove out to the shop. He put on the replacement label - crooked. I had one label left. I put that one one. However due to his prepping the panel, the surface had changed and the label stuck before I could quite get it aligned properly. Not good. Then, he began to mix clear-coat and the mix became stringy. Bad situation. He drove back to Lavina (half hour drive) to get more. He discovered that his more had been tipped over and spilt. Not good. All the supply houses in Billings had by then closed. I phoned Larry Matheson. He had various brands. James drove back out and fetched the mixes from Larry. We did manage to spray the panel, in a gusty winds. Thus, with each coat, dust and insects landed on the panel. Not great, and at least the panel was about as done as it was ever going to get. Next, James tidied up the PPG DP-90 black epoxy primer seams that Willie and I had been trying to fix. That went well. I spent the rest of the day completing electrical wiring. 10.00 hours. June 16, 2006 Friday I met with James Otterstrom this evening and he was very helpful in answering a few questions. He thought that he would clear-coat the pump panel early Saturday morning. If he heats the panel, it will greatly reduce the drying time. I talked with Mark Solonoski today, inviting him out on Sunday to help with some final outfitting. He seemed very enthusiastic. Misty and William appeared at the Lavina Fire Hall while I was meeting with James. William expressed an interest in coming out on Sunday. There may be quite a crowd. I estimate another 15 hours of work before completion and turning it over to the RVFD. Then, I'll assist with two evenings of training over the next two weeks. No photos. Okay - there are photos, and they'll be posted after the department takes delivery of the truck. We don't want to spoil the surprise of all the outfitting. I'll venture a guess that there will be over 70 photos when we're done. We'll also try to take photos during the RVFD evening trainings and post them here. 3.00 hours. This brings the running total to 192.25 hours. June 15, 2006 Thursday We did a bit of touch-up work on the PPG-DP90 epoxy paint. The is the mystery work that has been taking place. It did not turn out as planned and will need further tweaking. James Otterstrom is helping with this. No photos. We really waiting for the pump panel to receive its clear-coat. 3.00 hours. June 14, 2006 Wednesday It's Flag Day. Does anyone know what Flag Day is noted for? Few, very few. I continued with the ground lighting and am going to stop at installing two lamps. It's very time-consuming work and I need to wrap this project up in a few days. The inventory phase for the invoice will be quite a chore. Can you imagine noting the hundreds of parts and then developing a spreadsheet and entering the pricing? Not fun. No photos today. I'd really just like this project to end. 3.75 hours. June 13, 2006 Tuesday Cheryl Potter brought out the pump panel labels and the door decals. I think that was the easy part. I think that she was anticipating a day off, at least from her realm of work. That was not to be. We spent the next 6 1/2 hours attempting to apply the labels to the pump panel, in time for James to apply clear-coat in a couple of days. What a tedious process and one we are not likely to repeat. Silk-screening may be the way to go next time. We also applied the door labels to the rear left and right compartment doors. That also took time, due to centering issues. Somewhere during all these activities, we ate a tasty picnic lunch. I also continued with the ground lighting phase. Is the time put in today a typo? Nope - just too many hours. No photos today - some intrigue is useful. 11.5 hours. June 12, 2006 Monday The left-rear compartment lighting is complete and it works very nicely. The light even has a push-button on/off switch for those times when one may not want the light on. I installed the pump engine's exhaust muffler and rain cap. I had to cut a piece of 1 1/2" threaded pipe to do this. The engine noise should now be bearable. What else? Tomorrow we may see the pump panel labels. No photos today. 4.75 hours. June 11, 2006 Sunday I completed the installation of the battery chargers. The left-rear compartment's door switch was also installed. I tended to various odds and ends that needed wrapping up. For example, the left-side booster reel outboard roller mounting bolts needed an application of Loctite. The fiberglass is thicker on the left and there was no room for a Ny loc nut or a lock washer. I worked on a couple of things that will have to wait for the arrival of department personnel. I don't want to ruin the surprise. 8.75 hours. June 10, 2006 Saturday Good progress today. An outfitting hurdle was solved concerning the booster reel outboard rollers. We'll just have to wait till the department takes delivery of their truck, to see how this pans out. 6.5 hours. This brings the running total to 157.5 hours. June 9, 2006 Friday There was no work on the truck today. I was in Billings attempting to obtain parts for the truck. Several setbacks. The signage was bumped by Perma-Letter, by a week, which was not the agreement. That left an impression. The ground light brackets were not fabricated correctly and this was their second round. I hope to take delivery of both the signage and the brackets by mid week. I did get several aluminum pieces to use in the outfitting of the compartment door switch lighting system. That, at least, should go together nicely. 1.5 hours. June 8, 2006 Thursday Today was a light day, centered around continuing with the charger installation. It's very hard to mount the chargers when nuts and bolts can't be accessed for tightening. If my arms were about five feet long, it would be so much easier. A few feet of yesterday's booster reel switch wiring were adjusted and rerouted a bit. There's more work on the charging system. The charger for the battery under the hood awaits wiring and then both chargers will be wired to a shore power, 120 VAC inlet. The booster reel solenoid wiring saw some minor rerouting as well. 4.0. hours. June 7, 2006 Wednesday I spent about 5.5 hours doing electrical work on the booster reel and its rewind switches. It is time-consuming routing wiring in tight quarters. The LiteBox's charging wiring was also hooked up, along with an initial , pre-install test of the onboard battery charger (one of two onboard chargers). At this point, I expect to have the truck ready for pick-up on Tuesday, June 23rd. I'll need the better part of a day just to take inventory of all the parts used in the outfitting. I had most of the parts in stock, but they still must be accounted for, and entered into a spreadsheet with pricing. The two 75 foot lengths of one inch booster hose are due to ship on June 14th, 3-day Select, via UPS. The timing is good as the Department plans to conduct an evening training on June 20th. 5.50 hours. This brings the running total to 145.5 hours. June 6, 2006 Tuesday Bill Wright's mop-up reel brush guard was installed. It took much longer than expected due to a compartment interior wall being right under the brush guard's rear mounting flange. I had to cut away a small part of the interior wall in order to have space for the underside reinforcement plate and hardware. Thanks go to Wilie Paavola of Bull Mountain Excavating for prepping and painting the brush guard. I began working on the booster reel electrical hookups. June 5, 2006 Monday. Various parts were needed, so it was a Billings day. 4.25 hours. June 4, 2006 Sunday I spent about 5.5 hours today, in two shifts. :The first shift was spent installing the Hannay booster reel rollers, along with their rewind switches. The switches were tricky to install due to the fiberglass being deeper than the available thread depth on the switches. The second shift found me installing Handlelok Stretchlok Brackets to hold the Lavina Fire Wand. These are wonderful brackets that are very easy to operate. There is room in the brackets for a second wand. Fore more information on these brackets: I spoke with James this evening and he mentioned that he had sanded the pump panel. That took about 20 minutes. Thank you James. 5.50 hours. June 3, 2006 Saturday 7:30 AM found me at the Lavina Fire Hall to meet with James Otterstrom - auto body painter extraordinaire. I then returned to the shop to continue with some work on the truck. A tool tray was mounted to the front area of the left-sdie compartments. The left-side out-board Hannay hose roller unit was installed. The custom mounting bolts are just a bit short, due to the fiberglass compartment material being thicker than the typical aluminum on a fire truck. it was an install that took several hours. Sigh. If I count my travel time, so far today, I have 8.5 hours rung up. Another sigh. 8.50 hours. June 2, 2006 Friday Today was inspection day. I set out to Ryegate in my little VW at 7:30 AM. After a couple of hours of taking in the proceedings, I departed and drove to Billings to tend to various errands. I picked up a couple of Hobbs hour meters and some lights for the pending Ground Lights project. During my trip to Billings, the Ryegate crew returned the truck to the shop. During the evening, I spent 1.5 hours removing the controls from the pump panel. Various 1/4" and 3/8" hoses managed to leak water here, there and everywhere. I'll take the panel to Lavina in the morning and meet with James Otterstrom of the Lavina VFD. James is very knowledgeable in the body-painting department. Saturday Morning. He's going to prime, paint and then apply one coat of clear-coat to the panel, in preparation me to apply the labels. The labels are expected mid-week. As of this evening, I have no word as to how the inspection went. Booster reel hose update: Jim Darley tells me that I should see two 75 foot lengths of one inch booster hose within two weeks. Thank you Jim. 4.0 hours. This brings the total to 121.75. June 1, 2006 Thursday I managed to install and wire the LED lights for the pump panel and the deck light. At 1:30 PM, Floyd Fisher, William Stratman and Misty Stratman of the RVFD arrived to take the truck for a State inspection first thing Friday morning. 4.5 hours. May 31, 2006 Wednesday Something is terribly amiss. The hours per day are growing. Today saw 10 hours and 15 minutes dealing with this project, in order to meet a Thursday afternoon deadline. This is a first. There is a photo of me standing by the truck. My photo has never appeared on this website. Friend Cheryl is at the root of this development. A day of great progress and major obstacles, one of which may not be put right for four to six weeks. The truck is now ready to undergo the state inspection this coming Friday. Tomorrow, I get to tidy up the shop and have a very light go of it. I will appreciate the brief break. 10. 25 hours, which hurls the count to 113.25. May 30, 2006 Tuesday The installation of the Blizzard Wizard foam eductor system was completed. No leaks and no drips made the testing a pleasure. Various odds and ends were tended to today in preparation for the truck to be inspected on Friday. Tomorrow, I hope to install the basic wiring from the pump to the battery, via the batter switch. That sounds straightforward enough. I bet it takes a couple of hours as a hole will be needed in a compartment wall. The wall consists of fiberglass and steel, hard steel. 8.50 hours, in two shifts. May 29, 2006 Monday. I worked on the pump panel for a while today, preparing the two ball valves and the 2-way ball valve. All three were painstakingly mounted to the panel. James Otterstrom of the Lavina VFD is being a big help with the paint phase. He is doing about getting me the paint and clearcoat for the panel. 4.0 hours. May 28, 2006 Sunday. Today saw two shifts in the shop, one during the day and the second during the evening. Tedious laying out of and populating the pump panel was the theme. One has to get the controls in some sort of organized, functional layout. Label areas above the controls must be planned for. If one drills a hole in the wrong place - too bad, so sad. The consequences can be frustrating. If all goes well, the panel will be nice. Cheryl Potter of Aspen Glo Printing Design has been a huge help with labels and decal assistance. Total time today:7.5 hours, in two shifts. The running total is now at 90.5 hours. May 27, 2006 Saturday. Neil and Mark of the RVFD drove out to bolt the water tank to the bed, bolt the water tank lid to the water tank and place the 1" booster reel into position on top of the water tank. Many thanks go to Neil and Mark. Floyd Fisher stopped by and we wrestled with right-side compartment parts bins that just did not want to come out. Floyd has been making this project about as easy for me as it can be. The truck returns to the shop for completion after the state inspection. Thus, I'll be able to complete a variety of small tasks that enhance the overall function of the truck. Thanks Floyd. I hooked up the TankVision system. It works very nicely Total time today: 8.75 hours, in two shifts. The running total is now at 83.0 hours. The hours are building up by leaps and bounds. Yikes.May 26, 2006 Friday. I drove to Billings for various errands and to fetch a few parts, such as the rollers for the mop-up reel. Bill Wright fabricated a step-protection cover for delicate parts that attach to the rear tank's wall. Thank you Bill. Also, many thanks go to Dave Muler of The Montana Tank Works. Dave runs the company and has made possible all of Bill's fabricating for this project. Time devoted to the project: 1.25 hours. May 25, 2006 Thursday. I fired up the pump, checked for leaks - yes, there was a small drip by the 1 1/2" discharge valve and another by the direct-tank-fill cam-loc. Fortunately, there were no leaks deep in the maze of plumbing that would have been oh so hard to get to. What a relief. After repairing these minor and easy-to-fix leaks, I cranked the pump up, recycling water, to the point of 260 psi. No leaks. This was a big deal. I shut off the "behind-the-scene" recycling valve which resulted in the pressure building to 266 psi. No leaks. This was an even bigger deal. Then I phoned Floyd with the good news. It was a good day! 5.25 hours. May 24, 2006 Wednesday. Another marathon session today - 7.5 hours, which brings the running total to 67.75 hours. I must be insane. I spent a good deal of time pretending that I was a Sumo wrestler and grunted and groaned and heaved the tank forward and aft. This was necessary in order to fine-tune the tank's location on the bed. There is a cross-member under the bed that we want to avoid having to drill through. I did drill and insert the tank mounting bolts. I then measured and installed tank flanges and hardlines, having to move the tank back and forth again - several times. It sure is tough doing this stuff on my own, even though the tank has only an inch of water in it. I am going to wait for RVFD assistance with installing the nuts from under the truck. Dean Creek VFD firefighter friend Willie came by in the evening in time to assist me with the initial filling of the water tank. So far, under static pressure via gravity - no leaks. Pretty neat! Willie said that the outfitting was excellent. The key 2-way valve for the foam system arrived today, which will allow the planning and outfitting of the pump panel. It's looking as though much of the outfitting will come to a peak by the middle of next week. I'd like to see the truck completely finished and ready to roll out the door in time for the state inspection on June 2nd. That may be too ambitious. No photos today. May 23, 2006 Tuesday. Today the weighing of the truck took place. Montana DOT (Department of Transportation) portable scales arrived. Portable scale units were placed on the floor and the truck was backed on to them. We weighed the truck, complete with three adults in the cab. We transferred 200 gallons of water from Attack 1320 to the Ryegate truck's new water tank. DOT checked the portable scales again. After some pondering, we moved the tank forward about four inches. That's creates enough room to connect the tank with: Direct-Tank-Fill, Tank-To-Pump and Pump-To-Tank. After the DOT event, I set to work cutting thick rubber belting to place between the pump and the deck. It's taken many hours of attentive work to get to this point. Now the 3/8" ny-loc nuts can secure the pump to the deck. There are photos below. Bob Pallas brought along a few gallons of gasoline, enough to run the pump and conduct various operational tests. Thanks Bob. 4.5 hours today, which brings the total to roughly 60.25 hours. May 22, 2006 Monday. Went to Billings to fetch various parts. Spent the evening wrestling and arguing with a pair of poorly fabricated, extra-long 3/8"-Ubolts. Between the fetching and the wrestling:6.5 hours. May 21, 2006 Sunday. A marathon day: 8.75 hours. A very tedious day with the main event being the drilling of the pump mounting holes in the bed. Alignment and minimal stress on the rest of the pluming is critical. Using the Sawzall and drilling in tight quarters was no fun - lots of moving the pump into and out of position, lots of test-fitting and trying to not scratch anything. Realigned the stacked 2" pipes that go to the tank. One was too low, one was too high. Sigh & groan. Began painting the stacked pipes support brackets. Installed the gas tank tray and the gas tank. This was very tricky - too far forward and the gas cap is blocked by the intake hose fitting, too far back and the Guzzler primer pump is forced beyond the back edge of the bed. The location and fitting of everything depends upon the location and fitting of everything else. May 20, 2006 Saturday. The 200 gallon water tank arrived today. We'd like to go ahead with the plumbing and connect it to the system, but we must wait till next Tuesday for the weighing of the truck. - 40.5 hours have been racked up on this project. Today we installed the five gallon foam pail, the 10 pound ABC fire extinguisher, and the battery box. They went into the left-rear cabinet. Also, the manifold plumbing was completed by way of finishing the booster reel and mop-up reel ports. The last handy feature on the manifold is the recirculation line. No more opening the Pump-To-Tank line just a wee bit. What is a "wee bit" anyway? May 19, 2006 Friday. Wow - 40.5 hours have been racked up on this project. Today we installed the five gallon foam pail, the 10 pound ABC fire extinguisher, and the battery box. They went into the left-rear cabinet. Also, the manifold plumbing was completed by way of finishing the booster reel and mop-up reel ports. The last handy feature on the manifold is the recirculation line. No more opening the Pump-To-Tank line just a wee bit. What is a "wee bit" anyway? Pump Recirculation 101: Okay - we are on a roll here... what is the purpose of pump recirculation? Pump recirculation supplies ambient temperature water to the pump, to prevent steaming in the impeller chamber. which can be harmful to the pump seals. This can occur when all possible pump discharges are closed and the water in the pump has no place to go. The friction caused by the spinning impeller heats the water. Wildland fire pump operators are always fiddling with recirculation. There is no need to with this truck's behind-the-scene recirculation system. All the deck components (except the tank) are resting in place. We'll secure them over the coming days. We'll need a larger pump panel and we have yet to find the final home for the foam proportioner. County Fire Warden Floyd Fisher stopped by with additional parts. We enjoyed his visit and his kind comments regarding how the truck was progressing. It really is coming along nicely. Due to the crowded arrangement at the back of the truck, a water level site gauge now seems impractical. There are just too many pipes and hoses obstructing the required clear view. It is very important to know the water level in the water tank. So, we'll add a rather nifty TankVision water level monitoring system to this truck. We installed the same system on the Lavina VFD's 6x6 water tender and it works very nicely. Here's the TankVision website: TankVision May 17, 2006 Wednesday. Most of the 2" plumbing was permanently assembled today. There are times when it seems oh so slow. However, we are trying to do a tidy job of it. I took the plumbing on back side of the manifold apart and reassembled it with pipe sealant and Teflon tape. A great deal of effort is being made to insure no leaks on the discharge side of the pump - this pump is capable of 265PSI. May 15, 2006 Monday. I plumbed the front of the manifold this evening and chatted with Bill. I'm done with pipe wrenches for today. The evening session was topped off by Bill Wright stopping by with two pivotal brackets that he fabricated earlier today. There's a photo of these two simple yet elegant brackets below. Bill's contribution makes the rest of the plumbing possible. Ordered tool brackets. Ordered compartment matting for the cabinet containing the five gallon foam pail and 12 volt, 550CCA battery. Conferred with ReelCraft regarding roller option and extent of overhang for mop-up reel. May 14, 2006 Sunday. Finished populating the manifold. Retrofitted the exhaust primer at the pump intake. Relocated the impeller chamber drain petcock. Rotated the pump head 90 degrees to allow for more efficient discharge routing. Experimented with gas tank orientations to optimize deck space. Continued with possible plumbing layouts for suction and discharge sides of pump. May 12, 2006 Friday. Today saw the first major work on the truck. The overall layout was modified slightly from the layout of a few days ago. Space is at a premium and one must think outside the box. The manifold was bolted in place. A hardened bed rail below deck turned the task into a lengthy and tedious one. The manifold was test-outfitted with various valves. Later In the evening Bob Pallas bought master welder and fellow firefighter Bill Wright by to offer design and fabrication assistance with two plumbing brackets and one brush deflector for the mop-up reel. Thank you Bill. May 10, 2006 Wednesday I'm going to attempt to keep a bit of a day-to-day log here, covering the events and the progress. Golden Valley County Fire Warden Floyd Fisher and Under Sheriff Bob Pallas brought the truck to the shop and we took note of the Department's objectives and preferences. From there, a rough layout was developed.
|
The Photos - The most recent photos are just below. If you would like to see the outfitting progress from the beginning, please begin at the bottom of this page. |
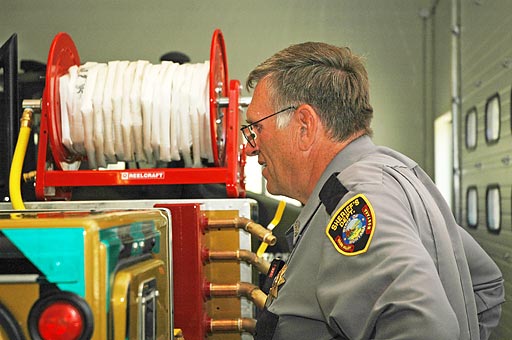
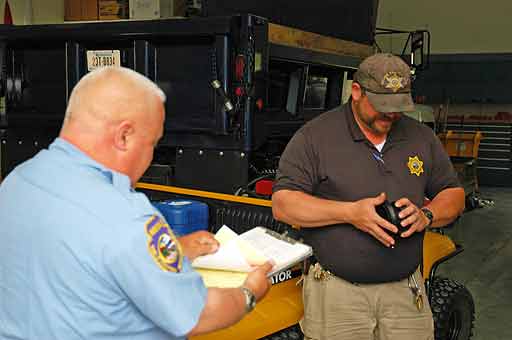
Floyd Fisher takes it all in and seems pleased. It is my understanding that this will be their "first truck out" by way of responding to a fire. |
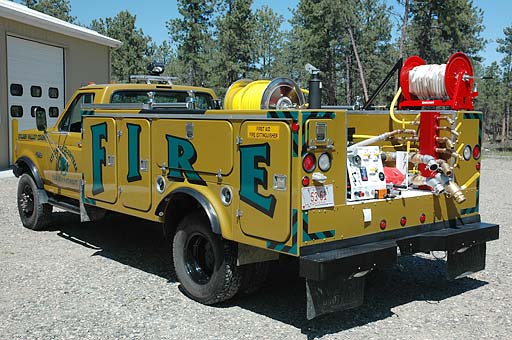
This is what we are ending with. Here's the finished truck. We feel that we've done a pretty good job. By the way, we are able to see a bit of the two ground lights under the rear bumper. Now that we're at the end of the outfitting project, compare this photo to the one just below. |

Least we forget what we began with, at the bottom of this page, here is the truck as it was first brought out for evaluation and measurements last March. It was the 17th of March with warm temperatures and no wind. |

Here is a closer look at the name/logo that is at the top of the pump panel. At the behest of Floyd Fisher, the County Fire Warden for Golden Valley County, Montana I am putting my name on the truck, in terms of my outfitting efforts. I don't normally do this. In fact, I have not done this before on any of the trucks that I have worked on. This new development seems based upon the caliber of my prior outfitting work. This is also before he had any concrete idea of the extent of what I was planning to do to their truck. That's a very nice compliment. We have managed to leave off any address or phone number. Why? Well, because this is a hobby and thus I contribute the effort and really don't want a line of fire departments at the door looking to get their truck(s) outfitted. You may be wondering why this website's domain name is not TacticalRepsonseSystems.com? It's simply too long a name to have to type in a browser's address bar. TacticalFire.com is much shorter and fairly easy to remember. Tactical Response Systems is registered with the State of Montana. |
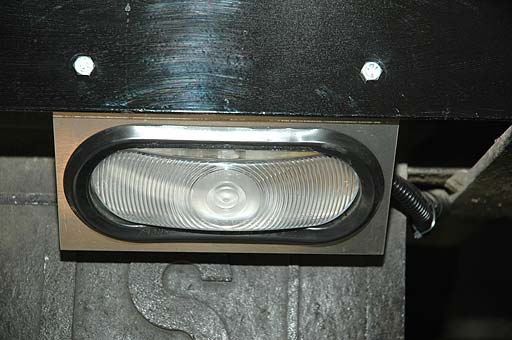
I did not have the time to install as many of these lights as I would have liked to. As the fire season develops, let's see how the department members feel about the two under the rear bumper. |
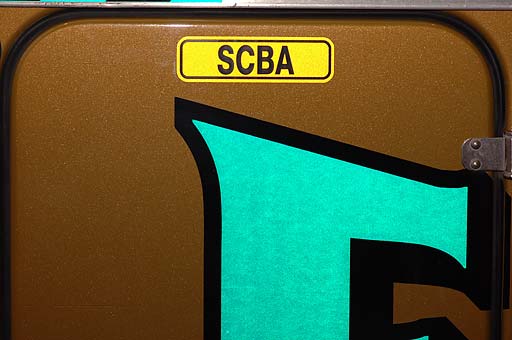
We've looking at the passenger-side rear compartment door with its Self-Contained Breathing Apparatus decal. Two SCBA cases are stowed in this compartment. Note the color changes with the camera flash. This truck will be very visible at night! |
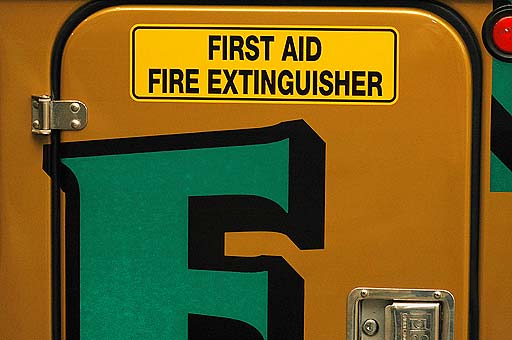
This photo is of the driver-side, rear compartment door with the decal indicating that there is First Aid and a Fire extinguisher inside. No flash was used for this shot. |
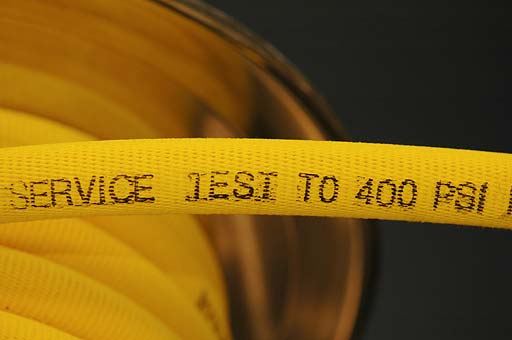
Another close look a bit further along the hose. |
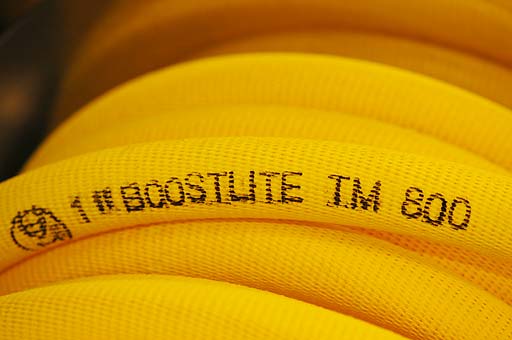
This is a close look at the Mercedes Textiles Limited booster hose. |
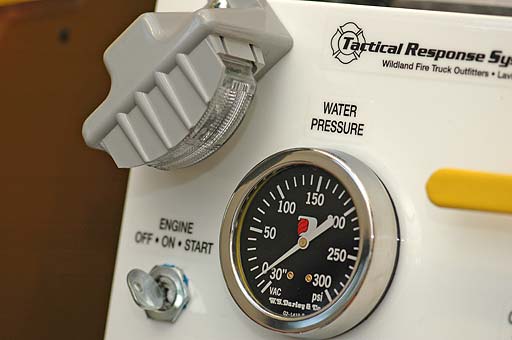
The Water Pressure gauge is nicely illuminated at night by the LED panel light. The water pressure is perhaps the most important information at any time, even at night. This LED light does a wonderful job of illuminating the entire panel. |
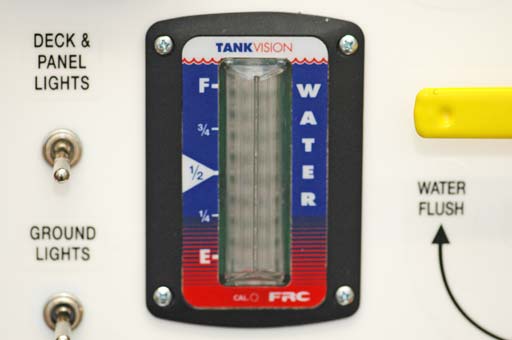
We didn't have the battery switch on, yet here's a close look at the TankVison gauge mounted in the pump panel. Everyone really likes this feature. Come to think of it, the LEDs would be too bright at this range. |
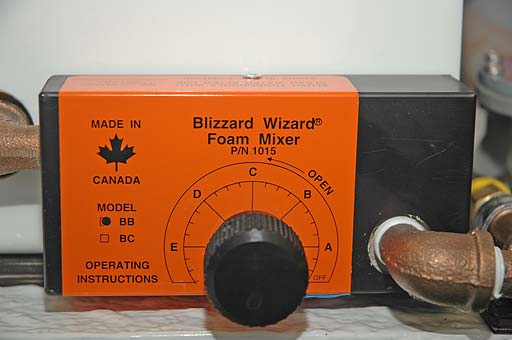
This is the eductor unit. It's a Blizzard Wizzard unit. For what these sorts of units do, they are ridiculously over-priced! I hated having to order it. |
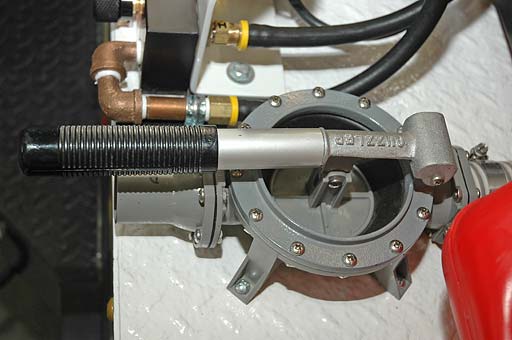
We've never had a close look at the priming pump. Here it is. It's a Guzzler, made by Bosworth in Rhode Island. It is rated at 15 GPM and we've ordered it with neoprene instead of rubber. It also has an aluminum ring on the top, instead of a plastic ring. It's a more solid unit. |
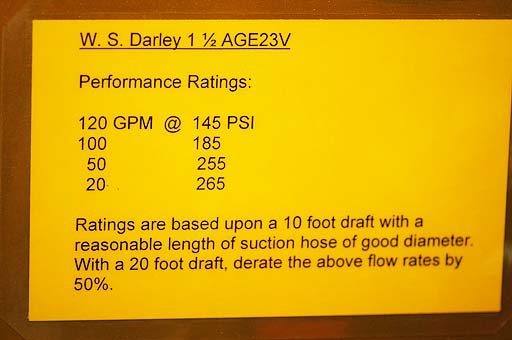
Here's a closer look. Darn, we forgot to include that these specs are with a five foot head of water. Oh well, the important information is there. |
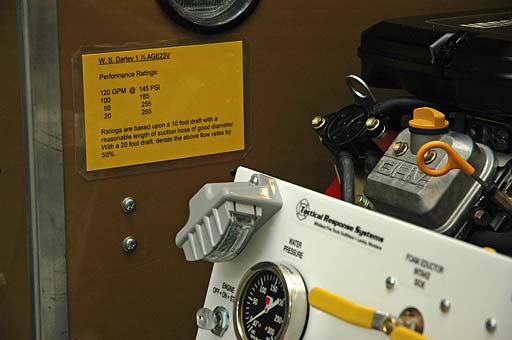
To the left of the pump, there's a placard providing the pump GPM & PSI specs. Why don't all wildland trucks have this? |
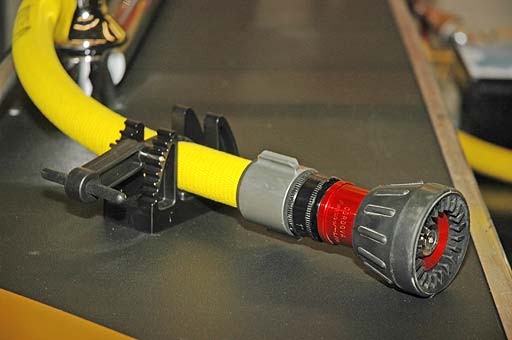
A close-up shot of the booster hose nozzle, stowed in its Handlelok Stretchlok Bracket. A pistol-grip shut-off was added just prior to delivery of the truck. That's a nice addition. The black epoxy-based primer layout was planned with that possibility in mind. |
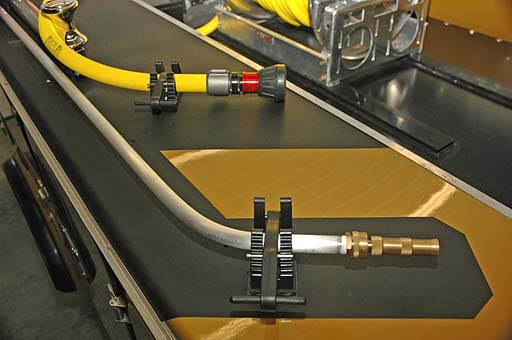
| We're looking at how the mop-up and booster hose nozzles are stowed. |

| Can you say "yellow"? The booster hose arrived today - June 19, 2006. The incorrect hose arrived a few weeks ago. Now, the truck is ready for delivery. |
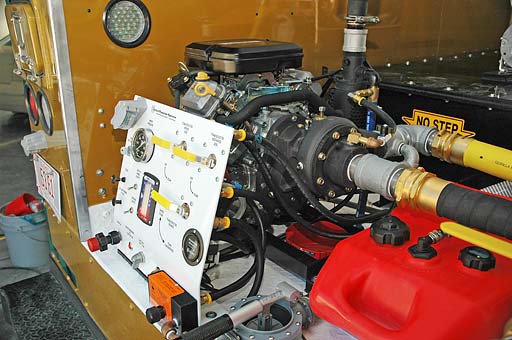
| Another view. |
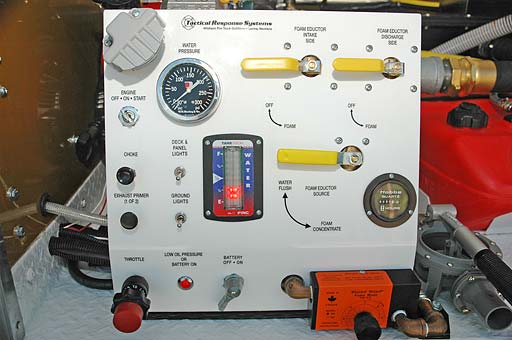
| The pump panel is outfitted and every item and feature works. Note: Many thanks go to Cheryl Potter who made the panel labels happen! |
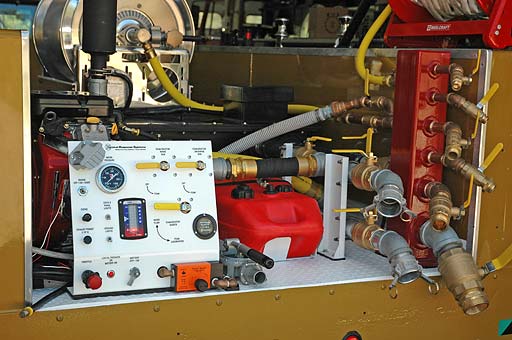
It's come a long way since May 10th. |
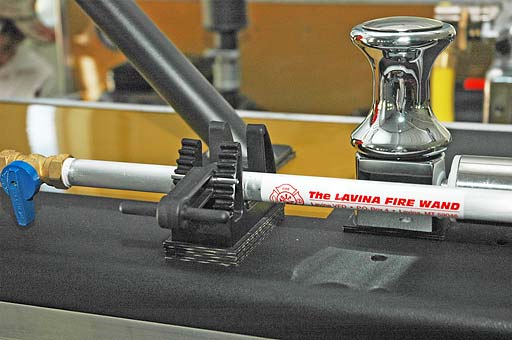
Is this the famous Lavina Fire Wand? Of course it is! This is the RVFD's first unit and they are going to love it. We're also getting a peek at the Handlelok Stretchlok Bracket. The department members really seem to like this hold-down system. |
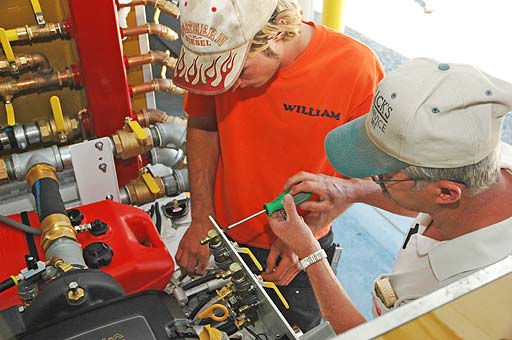
I assembled the foam system enough to get William and Mark started. This freed me up to take photos. |
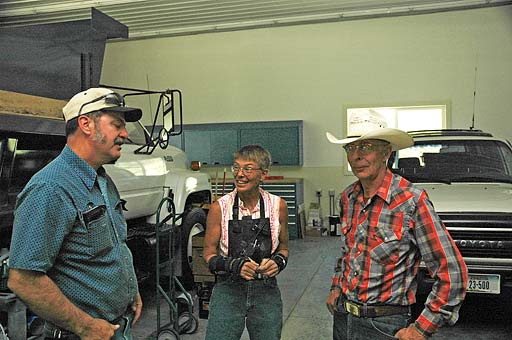
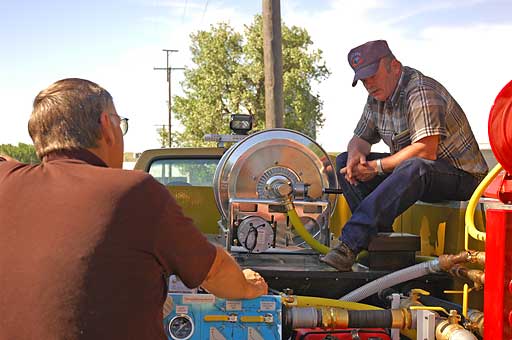
Tabby and Dan stopped by for a visit, which gave me a break. I remembered to take pictures, though not great pictures. Tabby's friend Dean is here somewhere, though not in the photo. He was walking around, having a look at the equipment. |
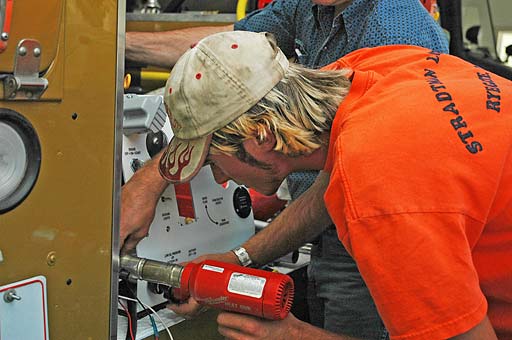
After crimping a wiring connector, Willie's using the heat gun on the heat shrink portion. |
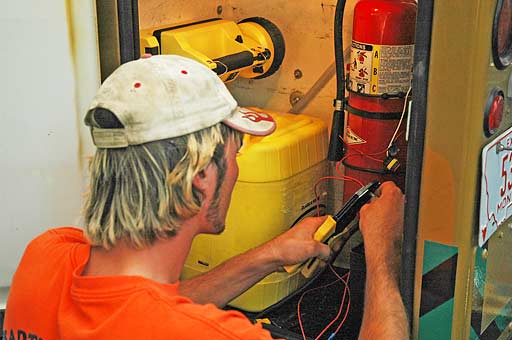
Willie is installing some of the wiring that controls the deck and panel LED lights. He enjoys it and is good at it and he saved me time that I was running out of. |
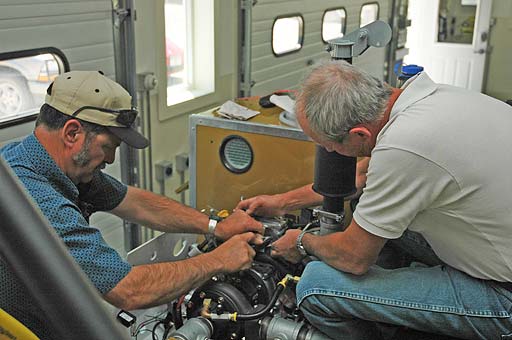
Work on one of the control cables continues. |
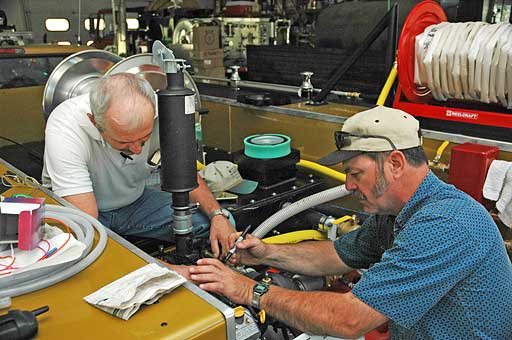
Mark and Neal came out to the shop to help install the Throttle, Choke and Exhaust Primer control cables. This wasn't as easy as it looked and took several hours. They were a big help and I greatly appreciated it. |
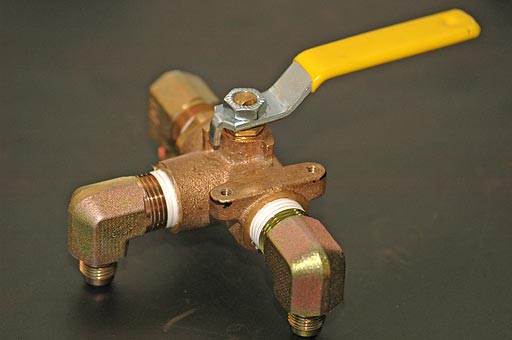
This is the 1/2", two-way ball valve that provides a choice of what the foam eductor sees at its input. In one position, it supplies foam concentrate. In the other position, it supplies water to flush foam concentrate from the eductor after use. Foam concentrate tends to dry out, gel and clog the eductor system when not used for a period of time. |
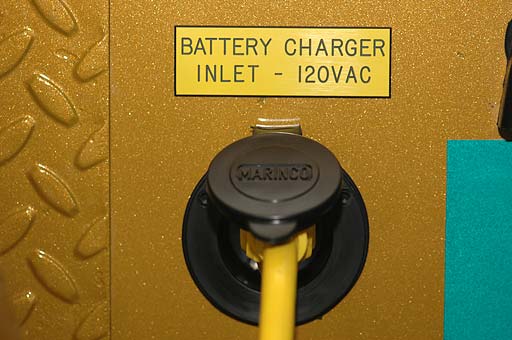
The inlet port for the battery chargers has been installed. There should be no more parking the truck in the fire station with the hood open and charger cables hanging out over the fender. There are those who wonder why we need a tag. The tag makes for a professional outfitting job. This receptacle is typically used on boats for shore power. Located adjacent to the driver's door, it can be quickly disconnected prior to stepping into the cab. |
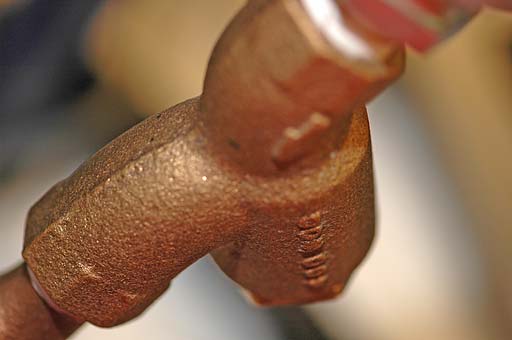
This is an awkward shot of the 3/8" Y-Strainer that screens sand and bits of river grass from reaching and clogging the foam eductor. It really is easy to get to and clean. |
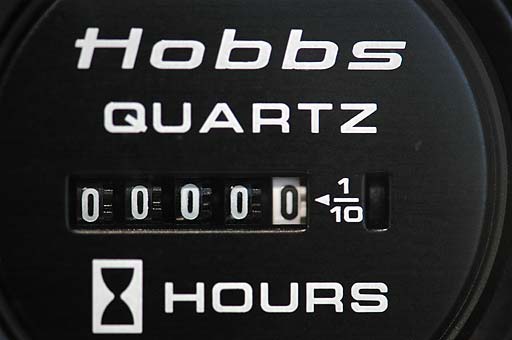
Here's the "Hobbs Meter", long the standard in engine hour meters. We took this photo with the micro lens. We can't get much closer! |
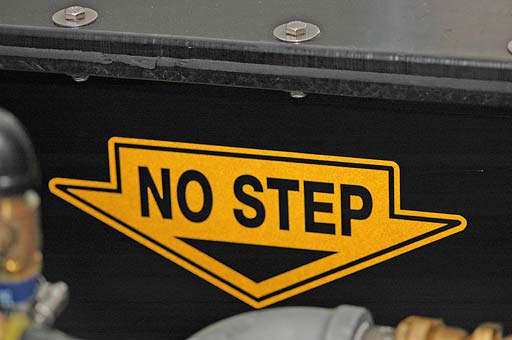
This decal is on the rear wall of the water tank - warning personnel not to step on the Tank Vision water level gauge transducer. Yes, the transducer is protected by a three-sided metal box, but still, we don't want folks stepping there. |
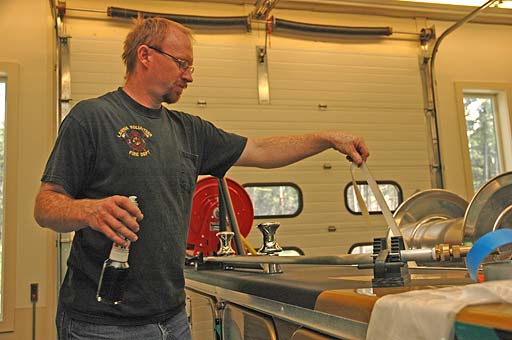
Pulling off the masking tape. |
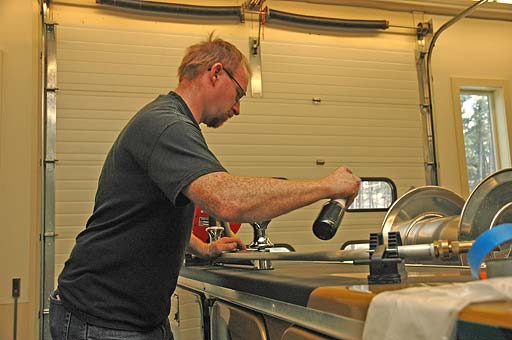
What's this man doing? It's James Otterstrom and he's touching up an area of PPG DP90 epoxy paint that Willie and I have been having trouble with. He's using his handy CO2 spray can - easy to clean up. Thanks James. |
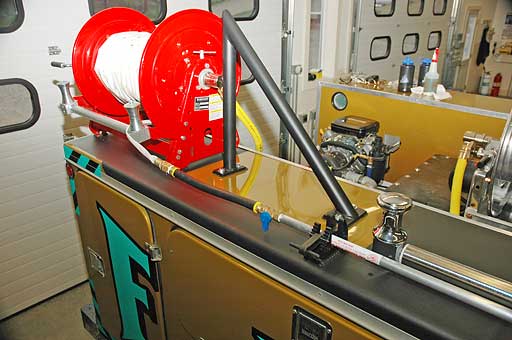
We're looking at Bill Wright's nifty brush guard that protects the mop-up reel. Thanks Bill. |
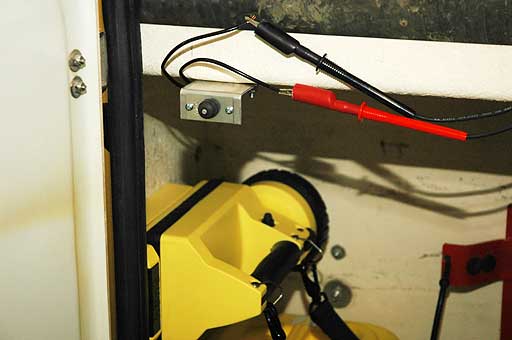
The door switch for the left rear compartment is finally installed. It's a custom installation that was a bit tricky. I'll wire it in a day or two. |
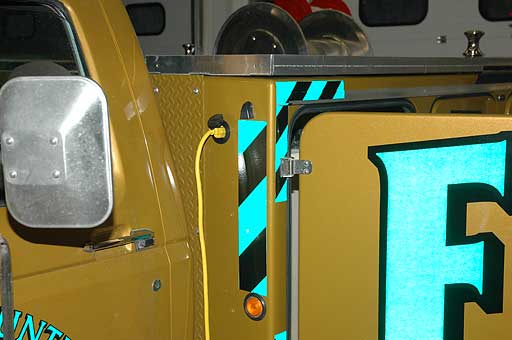
We're getting a look at the extension cord plugged into the battery(s) charger(s) inlet. In a few days, we'll have a tag above the inlet, identifying it. |
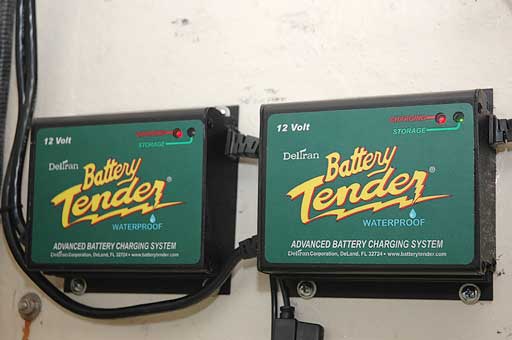
A closer look. Both red LEDS are solid red. The right-hand charger has a blinking green LED, indicating a float state. |
Both chargers are installed and functioning. The charger for the truck's under-the-hood battery was harder than one would think to run wiring for. |
What's going on here? Well, this is a mystery photo and that will have to do. By way of a hint, we're altering things a wee bit. |
We're looking at the routing of the driver's side booster reel rewind wiring as well as the wiring for the rear battery charger. There's almost no way to drill mounting holes in the fiberglass compartment without getting the fiberglass dust on one's skin. |
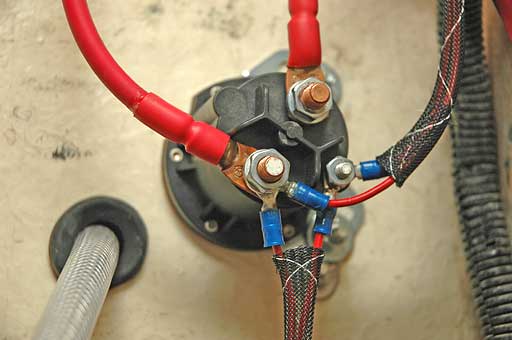
This is a close-up shot of the booster reel's solenoid. The clear-braided hose to the left is the foam suction. One of these days, I'll install the end of this hose in the five gallon foam pail. |
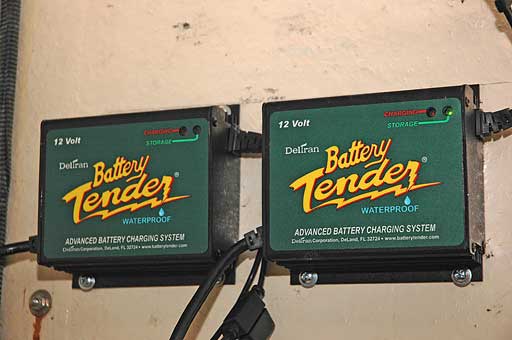
The chargers are mounted, though I'll need assistance tightening the nuts and bolts. The green LED on the charger to the right is just visible. The left-hand charger will be wired to the under-the-hood battery in a day or two. The AC wiring will follow. |
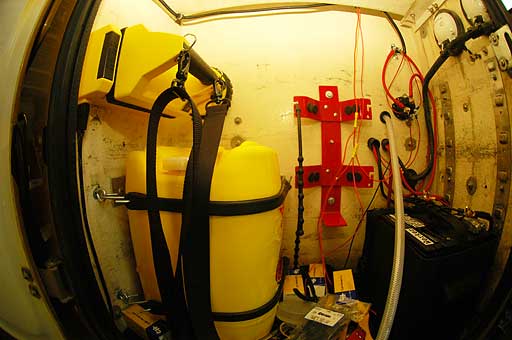
The electrical wiring of the truck is underway. The fire extinguisher has been removed to make more room for the doings. All ring terminal connectors are of course crimped, as well as soldered. Too often, short-cuts are taken in this area. This insures a sound connection over time, should they get wet. Further, all 4 GA and 6 Ga ring terminal connectors have a self-sealing heat shrink added. This makes for a ship-shape installation over the long term. |
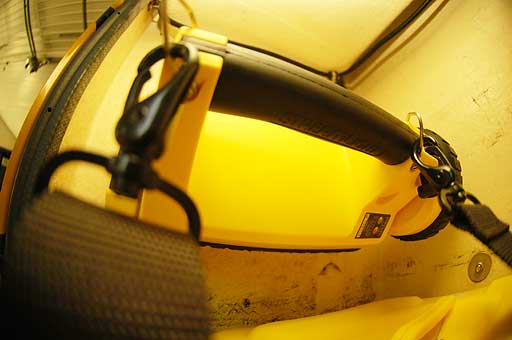
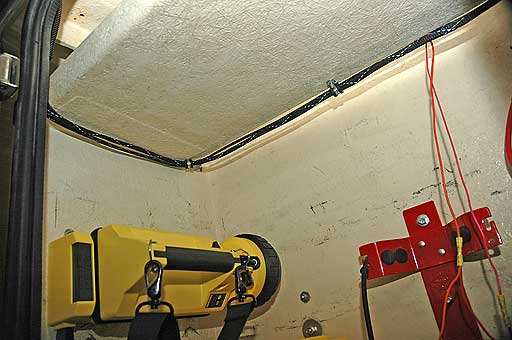
This is the LiteBox lantern that is stored in the left-rear compartment. Today, June 5, 2006 saw the charging system connected to the storage battery at the rear of the truck. The red LED, indicating a charging state, is just visible. This charger and the compartment's door light switch are the only items that will always be "on", when the Battery Switch is off. |
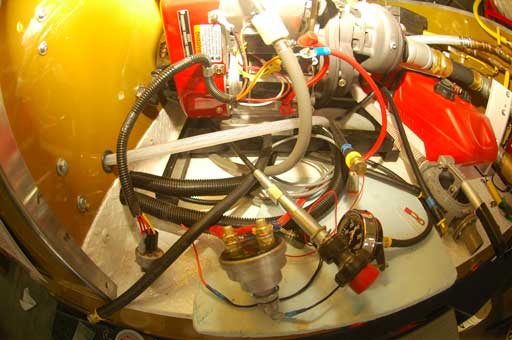
Disarray. The pump panel is awaiting the arrival of labels. The rest of the connecting hoses, components, parts and pieces are sitting in a box on the floor. The Battery Switch can be seen at the bottom-center of the photo. |
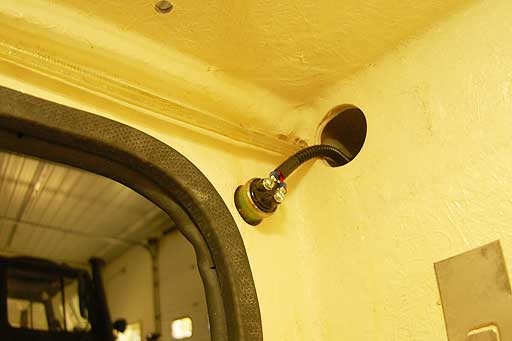
I had a heck of a time climbing into the passenger-side compartment to photograph the Rewind Switch for the Booster Reel. It's awfully cramped in there. This photo was taken after a test of both the driver and passenger side switches. There's a closer look at the driver's side switch about four photos down. |
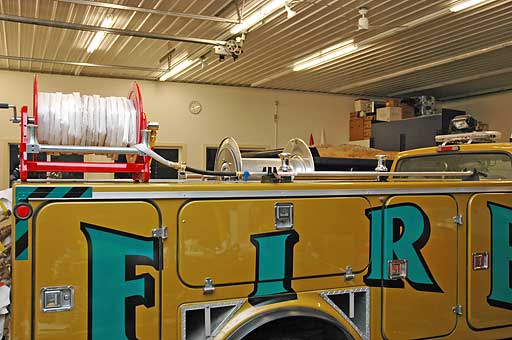
This is a full view of the Lavina Fire Wand's mounting, showing the wand connected to the mop-up reel. That reel should hold at least 300 feet of 3/4" mop-up hose. Not to worry - that mop-up reel will get a brush guard, in a day or two. |
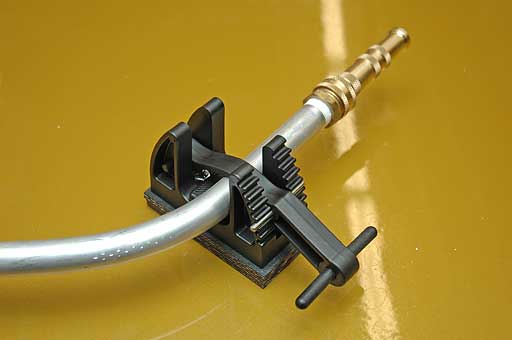
We're looking at the Lavina Fire Wand's tip, also secured with a Handlelok Stretchlok Bracket. What's more, there is room for a second wand to lie in the same bracket. |
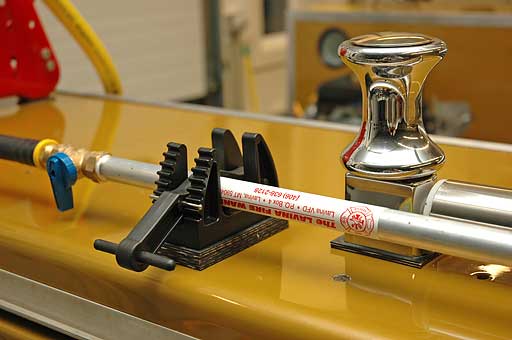
The passenger-side mounting of the Lavina Fire Wand is complete. The Handlelok Stretchlok Bracket secures the wand in a tidy stable fashion. Rubber belting under the bracket raises the bracket enough to prevent the blue wand valve handle from contacting the compartment surface. |
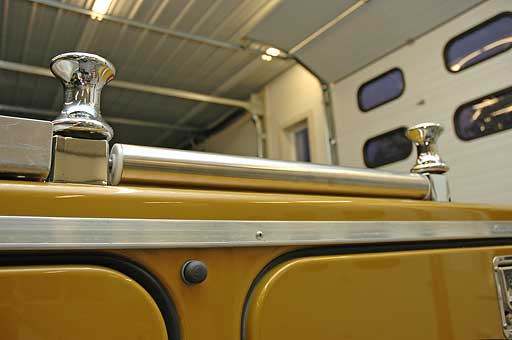
The driver's side booster reel rollers and the momentary push button switch have been installed. Mounting the switch was tricky due to thick fiberglass. We expect to add aluminum flashing to protect the curved edge of the fiberglass under the roller bar. The Passenger-side roller and switch are pretty much identical. |
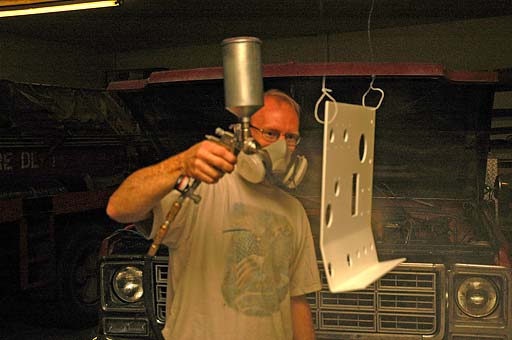
The base coat is dry enough and he's applying a couple of layers of clear-coat. He'll sand the clear-coat which will leave a very smooth surface for the labels. I hope that someone will bring the panel out to the shop in a day or two. I expect Cheryl's labels by mid-week. |
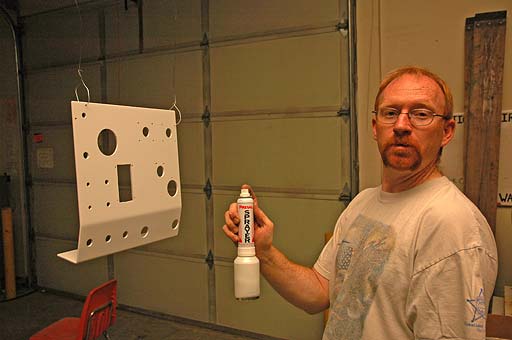
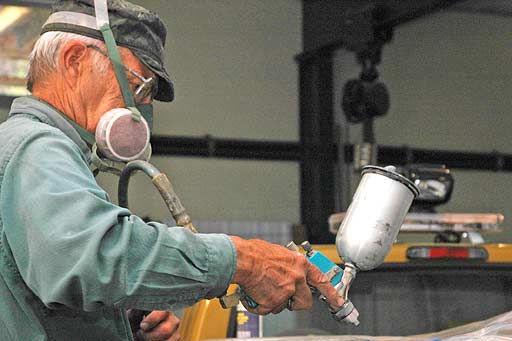
James makes painting with complex auto and truck type paints look oh so easy. In this photo, he's applied the base coat and is showing us the nifty little CO2 sprayer with the glass jar of GM White paint. This white should be a very close match with his white bed liner that he sprayed in several weeks ago. |
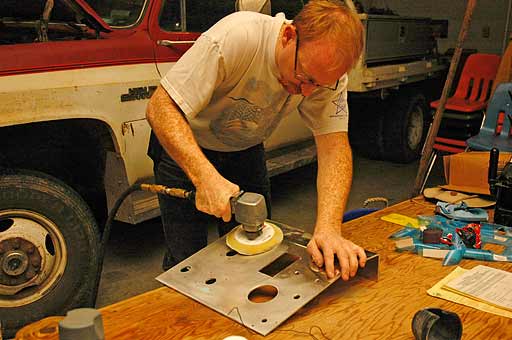
It's Saturday morning. James and I are at the Lavina fire hall. I am helping James paint the Ryegate pump panel - by taking pictures. Here, James is sanding the panel, and removing a few scratches. |
Floyd Fisher and Jerry ? discuss the truck. Jerry ? runs the DNRC operation in Lewistown, Montana. Jerry had kind comments as to how the truck was outfitted. |
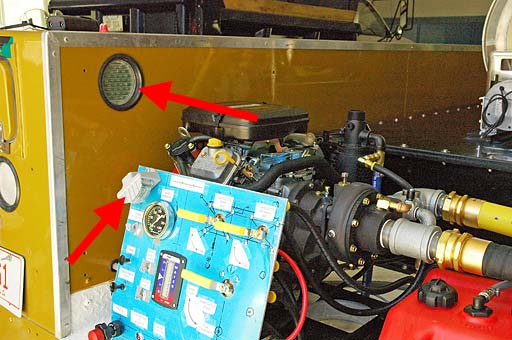
Before the Ryegate crew came to take the truck away for state inspection, I managed to install the LED panel light and the LED deck light. They will be a nice feature at night and the crew seemed delighted. When the truck is returned for final outfitting, I plan to install ground lighting, which will make for safer maneuvering around the truck in the dark. NFPA guidelines suggest ground lighting at all doors and ladder access points. |
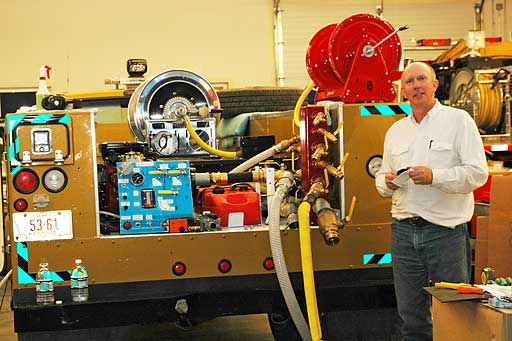
Friend Cheryl came out for most of the day, bringing tasty sandwiches and more. She also helped with various aspects of outfitting the truck. She's a real trooper. In fact, she didn't want to leave before taking my picture standing by the truck. So, here I am. I believe this is the very first photo of me on this entire website. I think this website has been in existence for over two years. For the record, this site is currently comprised of 790 files, mostly photos. TacticalFire.com occupies a total of 95,367,737 bytes on the server's hard drive. Cheryl and I worked on plumbing, hose reels, and the electrical system. The rear fire part of the truck is now powered by the dedicated on-board battery in the left-rear compartment. Great progress. I ordered two short hoses from Hose & Rubber Supply in Billings this morning. Cheryl brought them along with her. Uh-oh... they are too long by yards. I phoned Hose & Rubber and Jon not only re-made the hoses to the correct lengths - he drove out to the shop with them. Many thanks Jon. That made such a difference. What else? The state-of-the-art, high tech one inch booster hose arrived via UPS from Canada today. It is gorgeous stuff, but only 3/4" in diameter. What a major disappointment. It's going to be four to six weeks before we will receive the correct one inch replacement. I am not sure what we're going to do in the meantime. Heavy sigh. I may have to order Reeltex, which would be okay. It's worth waiting for though. Even though it will not hold up the way the heavy rubber hose would. It really is not used very often and the the light weight will more than offset the risk of melting. We'll see how it goes. |
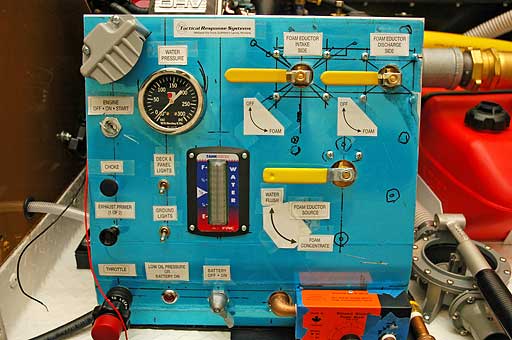
This is the rather nice pump panel. Cheryl Potter is being a wonderful help with the label phase of the project. These are cut-outs from her test sheets. We're planning on adding an hour meter to the lower right area of the panel. The blue protective plastic sheet will be removed and the panel will be painted white. In order to be painted, all the panel components must be removed. That should be fun. |
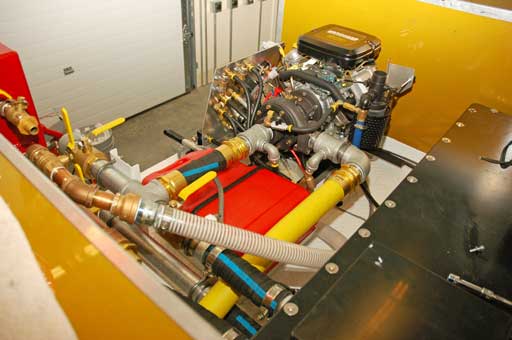
Here's a shot of the rear deck. Note the 1 1/2" clear, with white spiral, hose. This completes the Guzzler pump, used for priming the pump during drafting operations. |
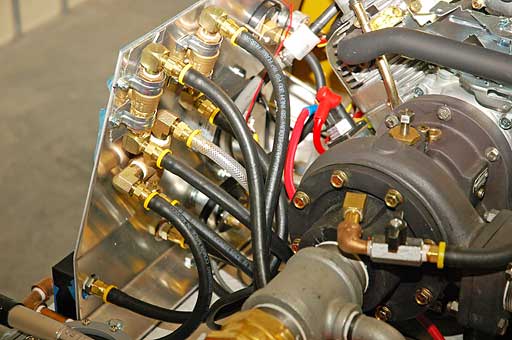
The foam eductor system was completed today, May 30, 2006. The system did not leak and looks about as complex as the inside of....... |
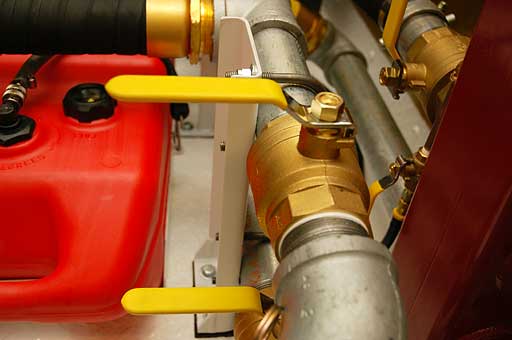
During moments of pondering what is next, the distracting print on the valve handles is removed. |
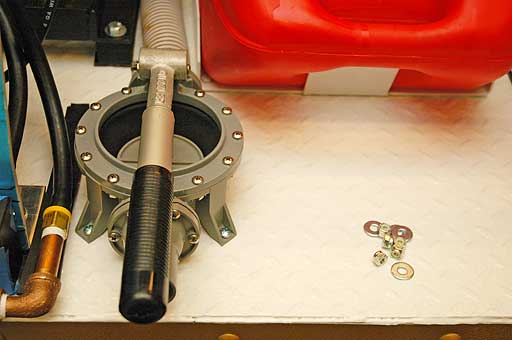
The Guzzler pump is ready to guzzle, to the tune of 15 GPM. |
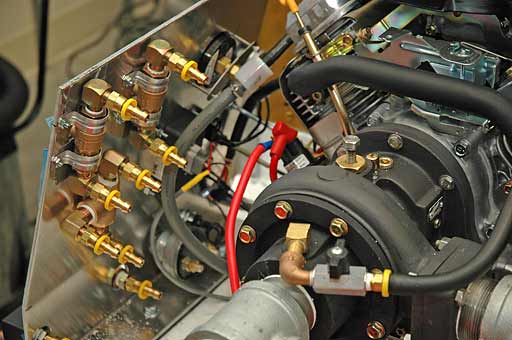
Is this fun, or what? This is the backside of the pump panel and it's loaded with components and foam plumbing. The next step is to fit the 300 psi 3/8 inch hoses to all those barbed fittings. This is followed by the priming, base coat, labeling, and clear-coating of the panel over the coming days. |
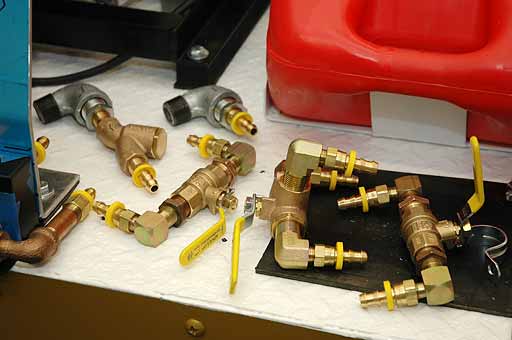
We're looking at the foam concentrate eductor system plumbing valve assemblies and related sub-assemblies. There are no hoses present - yet. This sort of intricate plumbing takes time - there is really only one chance to get it right. Fitting all these parts behind the panel in such a way as to not interfere with other parts is quite a challenge. When I have enough courage, I'll drill additional holes in the panel to mount the valves. The final assembly should occur in a few days - the panel needs painting. That'll take time. |
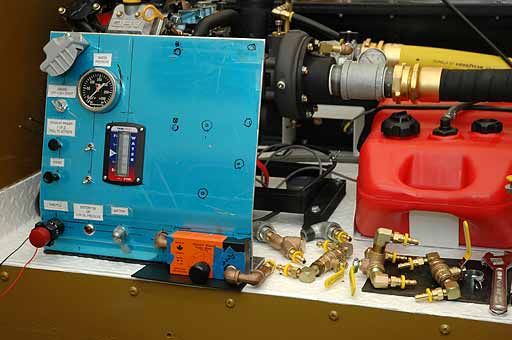
This is shot of the overall pump panel layout. It took most of the day to progress this far. In a few days, the panel will be primed, painted, labeled, clear-coated twice and then the parts will be installed. This will be very tedious, and detailed work. |
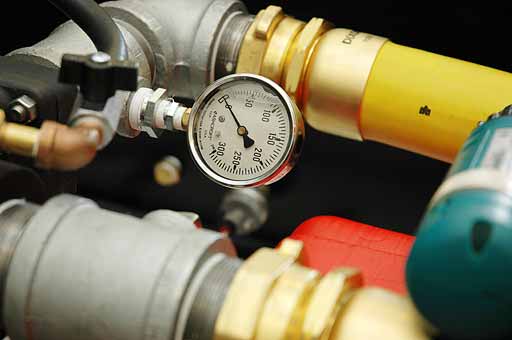
This is a view of the temporary water pressure gauge, mounted to the foam system's intake-side port. At the 8 o'clock position by the gauge, one can see a 3/8" plug in the rear wall of the water tank. This plug will be removed and the foam eductor's water flush hose connected here. At the 5:30 position, one can see a blurry hint of the TankVision's pressure transducer. These two units will be protected from someone's boot by a cover plate. These are just too delicate to remain exposed. |
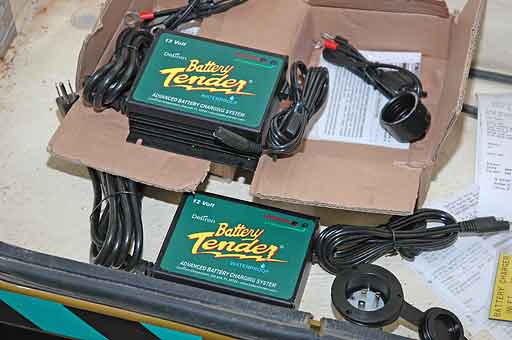
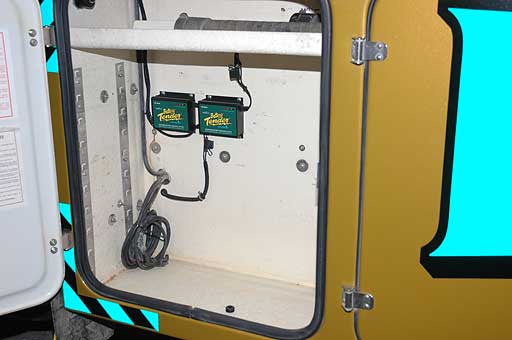
We're getting a peek inside the left-front compartment. The driver's turnout gear (duffle bag) will go in here. She or he is allowed 60 pounds of personal gear on a state fire. We're really looking at two battery maintainer units and a shore power inlet. They'll be mounted at some point during the next week or two. These two chargers will keep the under-the-hood battery and the pump/fire systems battery charged during standby. Keeping the truck and fire systems separate is a very nice feature. To the right, one can see a bit of the tag that will be placed above the shore power outlet, outside the compartment. |
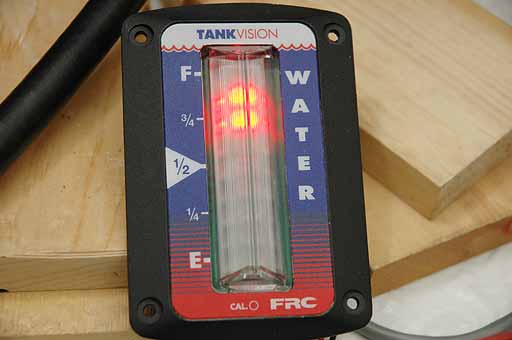
This is a close-up shot of the nifty TankVision gauge readout (see May 19th above for the website). Now that the tank is installed, with the lid secure, it's time to get the water gauge working. Here, the unit is cycling from top to bottom, illuminating two bars as it cycles. The tank is empty and this is the LED pattern once the tank is empty. When 1/4 full, the LED's at and below the 1/4 mark blink. All of this is very apparent from quite a distance from the truck - very handy when on a fire. |
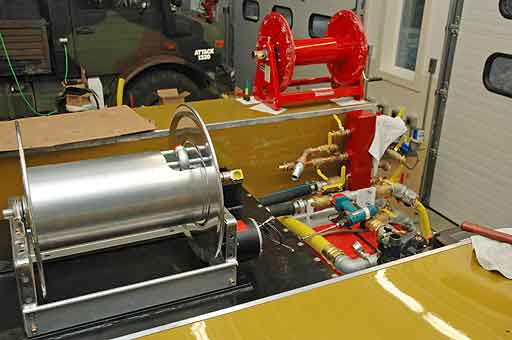
The Hannay one inch booster reel has been set in place. Roller and spool assembly units will be mounted to the cabinets. The drum will receive 150 feet of high-tech, lightweight, booster hose:
Electric rewind push-button switches will be on both the left and right cabinets. |
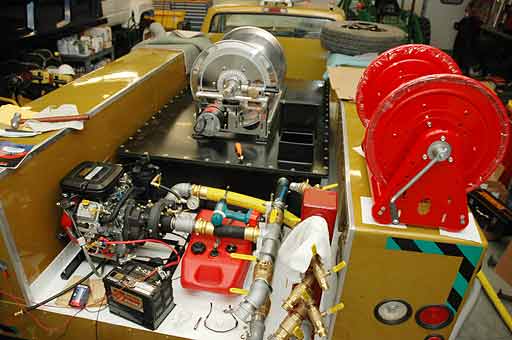
The tank has been bolted to the truck's bed. The tank's lid has been bolted to the tank's top flange. Also, the one inch booster reel has been lifted into place. On all three counts, thanks go to Neil and Mark of the RVFD. These are tasks that I simply can't complete by myself. Floyd came out for a visit during the doings and was very complimentary regarding the outfitting work. |
The two rubber spacers are finally in place. They insure proper alignment of the pump with the rest of the plumbing. It appears so simple and yet it took many hours to reach this point. |
The two brackets that support the Tank-To-Pump, Draft-To-Pump and Direct-Tank-Fill are finally in place. Bob Pallas brought out a few gallons of gasoline for the pump's gas tank. Thanks Bob. The tank will receive a hose connection to the pump's engine. |
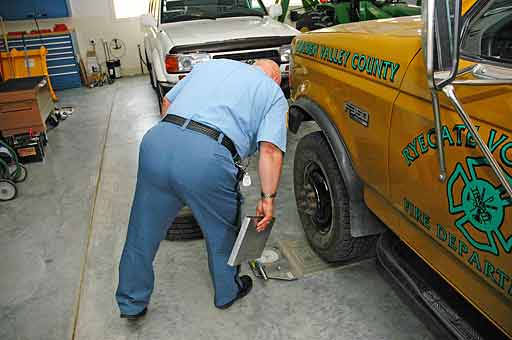
Mr. Portable Scales (Dave Strand) is noting the reading on one of the portable scales. Dave is with the Montana Department of Transportation, Motor Services Division. He's an expert at weighing all sorts of trucks. He made my work easier today - the tank's location in the truck's bed will work out just fine. |
Mr. Portable Scales (Dave Strand) is checking the numbers. |
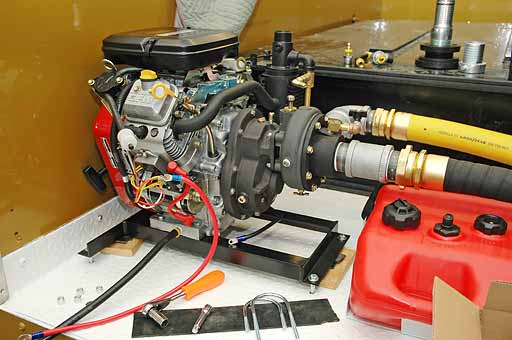
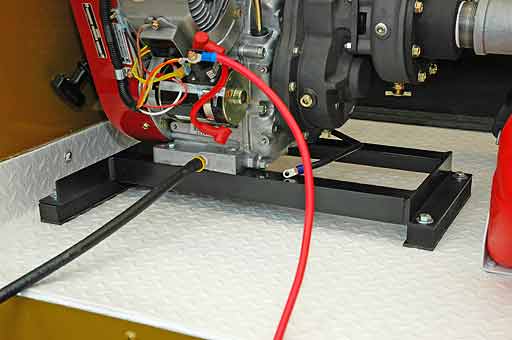
Spacers will be needed under the pump base frame. It appears that the hardest part is over, at least concerning the pump installation. Here's the sad part. This photo makes the install seem so simple, easy and straightforward. It really isn't! |
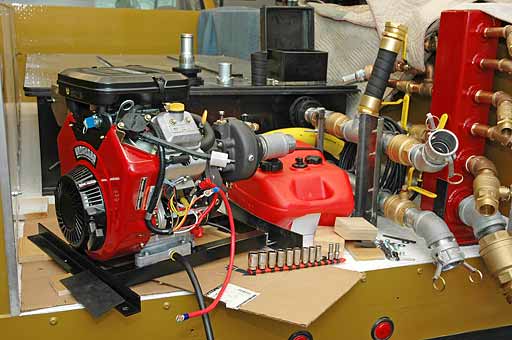
Neat & orderly - everything in its place and a place for everything. Notice the water tank in the background. This is the first photo that shows the tank. It's going to be so much fun drilling and bolting that thing down. I hope it ends up such that the bolts are clear of any cross frame members. There are several under the bed, enough to cause concern. I'm going to ask for installation assistance from the Ryegate VFD folks. |
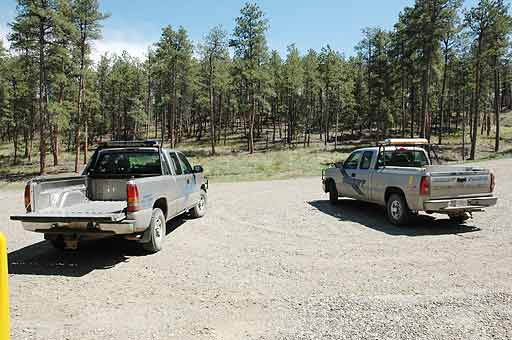
These County Sheriff trucks have been coming and going from my shop frequently over the past couple of weeks. What are the neighbor's thinking? |
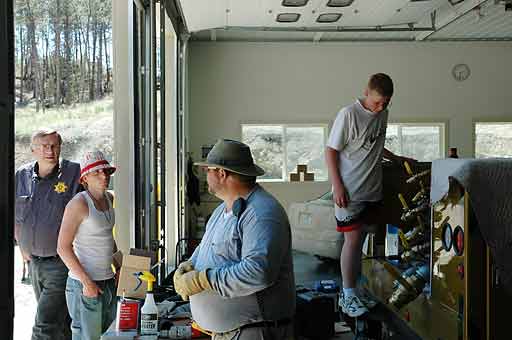
It's Saturday, May 20th and it's hard to help and take pictures at the same time. Floyd and Dwayne arrived with the 200 gallon poly tank. Bob and Robbie arrived to help transfer it from Floyd's County Sheriff truck to the "new" Type 6 truck. This photo shows the crew just after the tank was lifted into the truck. On the 23rd, the Montana DOT scales person arrives to weigh the truck. This could be interesting - the position of the tank in the truck's bed has a bearing upon the loading per axle. If the tank must be positioned too far to the rear, my work may be in question. We'll have to pump water into and out of the tank at least once to check the loading. A portable scale goes under each tire. We'll be sure to get photos of that process. |
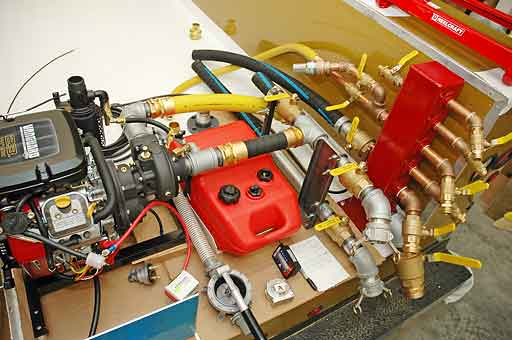
Here's a bit of an overhead view of the deck. The outfitting has its moments though the project is progressing very nicely. Soon, the tank will fill that empty space. The 200 gallon tank arrives this Saturday afternoon - very exciting. |
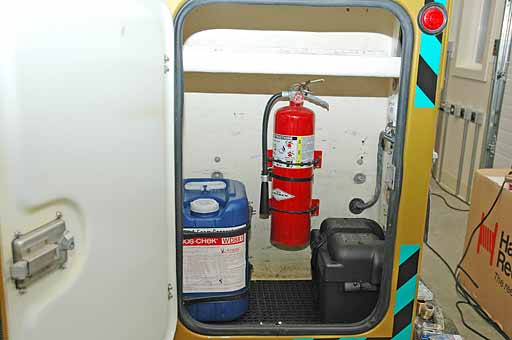
This is the left-rear cabinet, with foam pail, fire extinguisher and battery box. A LightBox (floodlight lantern) will be mounted high above the foam pail. A first aid kit will rest on the battery box. The cabinet door will receive signage indicating First Aid and Fire Extinguisher inside. The cabinet floor has a 1/2" layer of compartment tiles. These tiles have an open lattice pattern and are useful for separating the contents from a possibly wet floor. In the upper part of the cabinet, there is an eleven foot long tray that will contain two 10 foot suction hoses. The door for this tray is on the rear of the truck. |
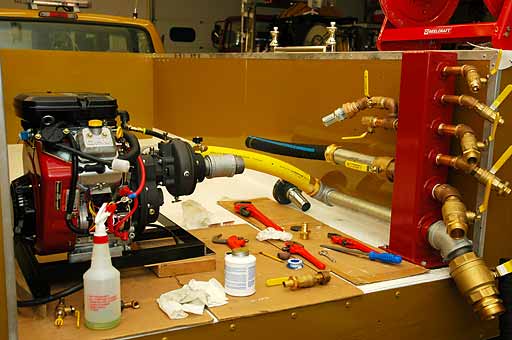
Sometimes it appears as though we are taking steps backwards. Honestly, the project is progressing. |
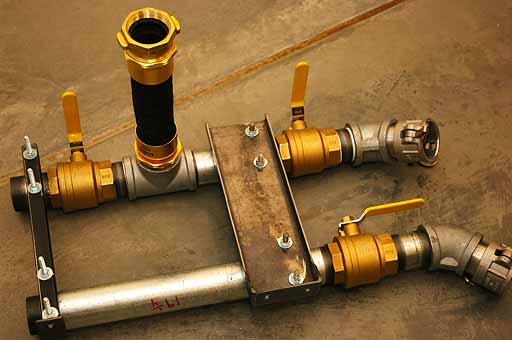
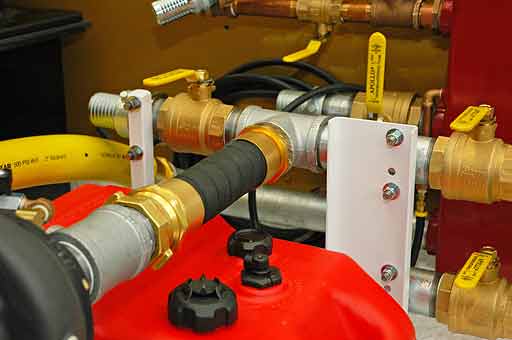
The two key brackets that Bill Wright fabricated are holding various 2" pipes and valves. We're looking forward to the U-bolts that Mark Solonoski is rounding up. The vertical hardline will be attached to the pump's intake. The lower pipe provides Direct-Tank-Fill. The upper pipe provides both Tank-To-Pump and Draft-To-Pump. |
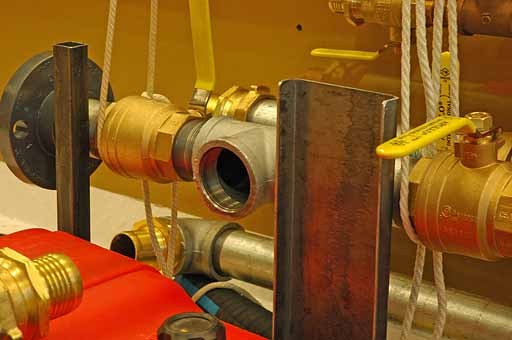
The slender 1" x 1" vertical tube steel to the left and the formed "C-Channel" to the right are the brackets that Bill Wright fabricated for the project. They will support the Direct-Tank-Fill line, the Tank-To-Pump line and the Draft-To-Pump. |
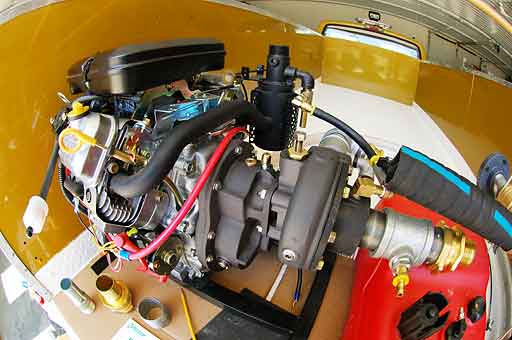
This photo shows how much room there is between the other side of the pump and the front of the bed. It looks as though there's 20 feet. Actually, it's about 7 feet. |
 |
|---|
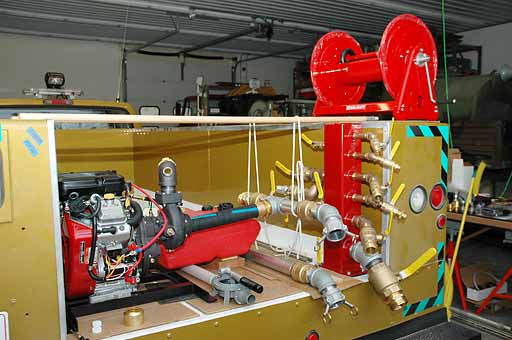
Here's another view. We're "stacking" the plumbing in order to utilize the cramped deck area. |
 |
|---|
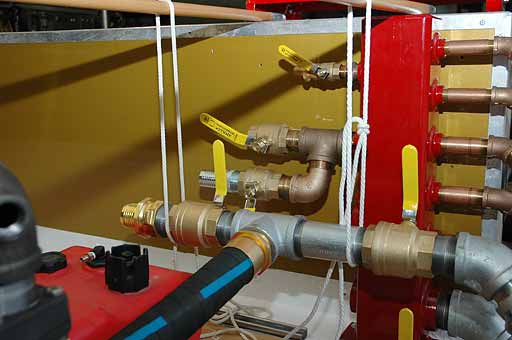
The Tank-To-Pump and the Draft-To-Pump plumbing are taking shape |
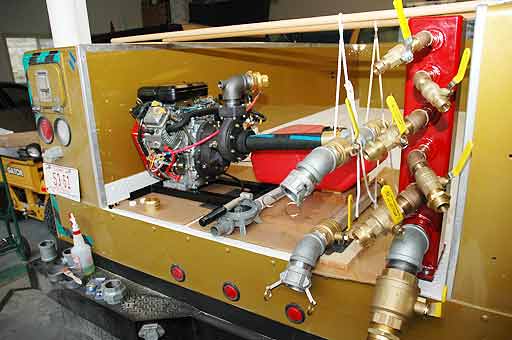
The overall layout takes shape. |
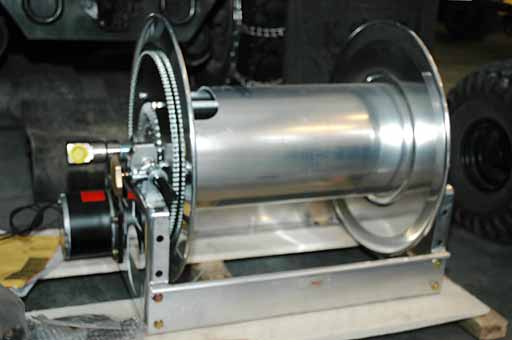
The Hannay booster hose reel has arrived. It will hold 250 feet of one inch booster hose, though it will receive only 150 feet. It's nice to have some spare room. |

This is what we will be outfitting. |
This is what we are beginning with. |